Pages

Showing posts with label kimberley's kitchen. Show all posts

Saturday, June 6, 2015

RECIPE :: Peach Pie Pockets

pie pockets, peaches, how to make a peach pie, perfect pie dough
   

Peachy Keen

Hello! Kimberley here and as summer approaches, the farmer's market brings beautiful local fruit. In anticipation of peach season, I couldn't resist making these little Peach Pie Pockets with my kids. A perfect summer treat that's easy to make with the kids. It all starts with perfect pie dough, and then fresh peaches (or other in season fruit), and a simple technique to make perfect pie pockets every time. Experiment and let me know how they turn out!


Peach Pie Pockets

(makes approx 12, depending on size of cutter)

Perfect Pie Dough

- 3 cups all purpose flour

- 1 teaspoon salt

- 1 Tablespoon sugar

- 1 1/2 sticks cold unsalted butter, cut into 1 inch pieces

- 1/2 - 3/4 cups ice cold water

- heavy cream for brushing on pastry


- blend dry ingredients in food processor or large mixing bowl

- add cold butter and blend to crumb texture (or cut in using two knives or hand pastry blender)

- slowly add ice cold water until dough comes together; do not allow it to get sticky

- turn dough onto lightly floured surface and make two rounds, approx 1 inch thick

- wrap in plastic wrap and place in fridge while making filling

peaches, plate of peaches, fresh peaches, peach pie recipe


Filling

- 4 ripe peaches (or 2 cups any fresh fruit that works well for pies, such as blueberries), peeled and cut into 1 inch pieces

- 2 Tablespoons corn starch

- 1/4 to 1/2 cup sugar (depending on sweetness of fruit)

- 2 Tablespoons butter, melted

- juice of half a lemon


- in a medium bowl, mix all ingredients together and let sit at room temperature


Baking

- preheat oven to 375 degrees
- line two baking sheets with Silpats or parchment paper
- roll one round of dough onto a lightly floured surface to 1/4 inch thick and 
cut with round or square pastry cutter (I used a 4 inch cutter), in even numbers
- place bottom pastry pieces on baking sheet, 2 inches apart, and brush edges 
with heavy cream
- place 1 to 2 Tablespoons filling in centre of pastry
- place lid pastry on top

- crimp edges with a fork and brush tops with cream, slice 3 vents in top of pastry
- repeat with remaining round of dough (depending on the size you make you may have a little bit of leftover dough)

- chill pies in freezer for 15 minutes
- bake for 15-20 minutes, until golden brown
- cool on wire rack before serving; these are very hot inside so be sure to cool before serving
- serve with whipped cream or ice cream or wrapped in a small parchment paper wrapper

Enjoy!

peach pie pockets, how to bake a peach pie, fresh peaches


Guest Contributor: Kimberley Mulla


My Mom gave me my first cookbook when I was six years old. I have been baking & cooking ever since.

I specialize in artisan marshmallows & confections. I want to sell a product that I would feed my children. The ingredients are simple, often local, organic & fair trade as well. 


I love making marshmallows. Every single one. It brings me so much joy to create something unique, tasty, and delightful.


You can follow Kimberley


Thursday, September 4, 2014

RECIPE :: Easy Peanut Butter Granola Bars

easy granola bars, granola bar recipe, peanut butter, perfect snack idea


Easy Peanut Butter Granola Bars

by Kimberley

Granola Bars are the quintessential lunch box snack, and these easy granola bars help you put a healthy version in your little one's tummy. If peanuts are a concern, you can sub in almond butter or any homemade nut butter. 


ingredients needed to make peanut butter granola bars, snack, lunchbox

Recipe
(makes 9 large square bars)

~ Preheat oven to 325 degrees. 

~ Prepare a square baking pan by lining with parchment paper with paper up the sides to easily remove the bars.

~ Mix in a large bowl, 2 cups whole oats, 1/4 cup vegetable oil, 1 egg, 1/2 cup peanut butter, 1/4 cup organic sugar, and 1/2 teaspoon of salt. 

~ Mix until incorporated and spread in a flat layer in prepared pan.

~ Bake for 30-35 minutes.

~ Remove from oven and allow pan to cool on wire rack. 

~ Once cooled, gently lift paper out and place on cutting board. 

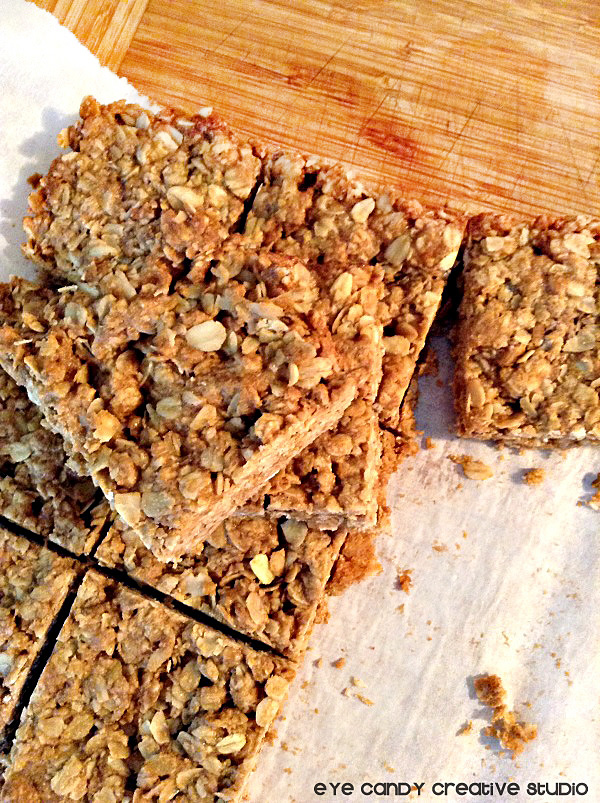
~ Cut bars with a serrated knife and store in a sealed container at room temperature for up to 5 days.
Enjoy!

cutting granola bars, how to make granola bars, homemade granola bars
cutting the peanut butter granola bars, how to make granola bars


Bake Like a Pro Tip
Parchment Paper is an amazing tool for bakers. It is now widely available in grocery stores and is an excellent option for lining pans and cookie sheets without adding extra oil to a recipe. It also allows you to avoid non-stick bake ware if you are concerned about the health and safety of such surfaces. I often re-use my parchment sheets that were used for baking cookies, as the paper stays relatively clean if not baked at a high temperature.


baking peanut butter granola bars, perfect snack idea, healthy eating


Guest Contributor: Kimberley Mulla


My Mom gave me my first cookbook when I was six years old. I have been baking & cooking ever since.

I specialize in artisan marshmallows & confections. I want to sell a product that I would feed my children. The ingredients are simple, often local, organic & fair trade as well.


I love making marshmallows. Every single one. It brings me so much joy to create something unique, tasty, and delightful.


You can follow Kimberley


Thursday, August 14, 2014

RECIPE :: Simple Homemade Granola

     
back to school breakfast, granola recipe, healthy breakfast, kids breakfast


Back-to-School Breakfast

by Kimberley


We all know we need to eat it. We all know it's good for us. Breakfast. I think it just might be the most "pinned" topic for back-to-school. Whether it is the morning routine or lack of appetite first thing, breakfast is hard to fit in once the school year starts. A great strategy is to pack breakfast in your child's bag, giving them something to snack on before the bell rings, or a healthy snack to start the day. 


I bake our own granola and cereals to ensure the highest quality food is going into my little one's tummies first thing in the morning. I have experimented with many granola recipes but I always come back to this one for its ease and simplicity. This basic granola allows you to add any extras that you want- nuts, dried fruit, flaked coconut, or seeds. Or stick with the basic recipe to accommodate for allergies. (Check out my Bake Like a Pro tip for really healthful cooking and baking!)

kids lunchbox notes printables, lunchbox notes for kids, make today great


If the morning is rushed, pack this granola (which is great to eat dry with your fingers) for a morning snack and you know that your kids are starting their day with something filling and nutritious. To make it even better, pack a few of these adorable Lunch Notes by Eye Candy Creative Studio so that you can send a little love in their bag and brighten their day.


Simple Granola Recipe
(makes 8 servings; recipe can be doubled)
- In a large bowl, mix 4 cups whole rolled oats (not quick oats) with 1/2 cup honey. 
- Once mixed, add 2 teaspoons of cinnamon (or other spice such as ground ginger or pumpkin pie spice), and mix to combine. 

mixing ingredients to make granola, homemade granola, breakfast food
how to make homemade granola, kids breakfast, healthy eating, granola


- Pour onto a well oiled large cookie sheet, spreading it out to allow for even baking. 
- Bake in a 300 degree preheated oven for 15 minutes, remove from oven and toss. 
- Bake for 15 minutes more, remove from oven, toss gently on pan, and allow to cool on pan. 
- Once cooled, granola can be stored in an airtight container at room temperature for up to 5 days. 


Bake Like a Pro Tip
So many baking and cooking recipes call for spraying pans and dishes with vegetable oil spray. It is such a convenient product that makes clean up much easier. However, if allergies or health concerns make you shy away from these products, there are some alternatives. I bought this pump spray bottle at my local kitchen shop. I have seen several bottles like it. It allows you to fill the bottle with the oil of your choice and then you can spray your pans. I use organic canola oil in this bottle for when I need to spray pans. It also cuts down on the cost significantly because oil is much more cost effective than the canned sprays.


:::::::::::::::::::::::::::::::::::


Guest Contributor: Kimberley Mulla


My Mom gave me my first cookbook when I was six years old. I have been baking & cooking ever since.

I specialize in artisan marshmallows & confections. I want to sell a product that I would feed my children. The ingredients are simple, often local, organic & fair trade as well.


I love making marshmallows. Every single one. It brings me so much joy to create something unique, tasty, and delightful.


You can follow Kimberley